I’m now at the stage of designing levels for Neon Arena, and finding the process of leading players through an absolutely fascinating one. Where do players naturally go? How can we design levels to make the best of that – or how, when the design requires it, do we override those instincts?
So, this is a case study on how a couple of specific Mirror’s Edge: Catalyst levels achieve that, and some examples of how I’ve been using it in my own project so far.
Almost all the images below are from the sixth mission, Benefactor, which is a tremendous one – a straightforward run up a skyscraper to sabotage the anti-storm pendulum (by pulling out a series of computer chips?), and then a climb down as the building sways around you. It’s great fun, not least because it doesn’t bother with the mediocre combat (and Dogen, the creepy crime boss whispering in your ear, is the least irritating character you’ve met so far.)
Color
This is the one that Catalyst uses all over the damn place, since it trades so heavily on Runner Vision, which is two abilities: highlighting significant props in red, and summoning a sort of sprite to trace the player’s path through the level. To a certain extent, Catalyst takes all these rules i’m laying out and smears the bright red highlighting of Runner Vision all over them, which suggests to me primarily a lack of faith in the rest of the tools they used: providing the player with a step-by-step guide to traversing the levels means that everything else slips into the background a bit. Still, I can’t really begrudge them for wanting to lower the barrier of entry.


I’ve expressed disappointment in Catalyst’s more muted palette than ME1 before, but it’s used much more carefully.
Vocabulary
The next thing Catalyst does – and something the original Mirror’s Edge did too – was develop a clear vocabulary of props, patterns, and sizes. Certain props are used almost exclusively for the navigation of the game, and although there’s a wider selection of them, once you know what you’re looking for (and you’ll learn quickly and without conscious thought) they’re as clear puzzle elements as the box/button combo in Portal or a flag in Quake or something.
Similarly, the player will quickly get used to which sizes of object can be jumped, which can be wallran, and which can be used as springboards. Even unique props such as the desk below are easy to navigate, so long as they stick to these size guidelines.

These are particularly important in the open-world sections of Catalyst, and I want to replicate them for Neon Arena. When it’s not easy to predict which directions players will be coming from, the other tools in this list start to fall apart a bit – or even work against you. Players just want to go straight from A to B, and giving them the tools to do this on instinct lets them navigate without really thinking about it – until, of course, you want them to.

Density Of Detailing
This is something I’m very familiar with from my days in multiplayer level design, and in that is the main way of drawing the eye there. The human eye is drawn to areas of higher noise and more visual interest, you see, which means that an easy way to make a player pay attention to what they should be is to cluster the details around there and make it more visually noisy. Look at the practically blank walls in most of the screenshots above: the vestigial environment artist in me screams out at such a lack of detail. But, of course, that’s not the point. You’re not meant to notice them, you don’t need to care about them. Your eye goes to wherever the designer wants it to go.

This one is almost all in the detail – although, a good non-artist designer will still be building levels thinking about how the detail fits in. Mirror’s Edge has a lot of vistas onto the open city, and most blur the city background sufficiently that it all fades into the background – however I suspect (I’ve no proof for this) that in certain areas this blur is turned down, allowing the city vista itself to act as the dense detail. (Compare the image above to the Bryson one a few higher, for example.)
It’s easy to see in action, using an old trick for composition – unfocus your eyes, and see where your view is drawn to.
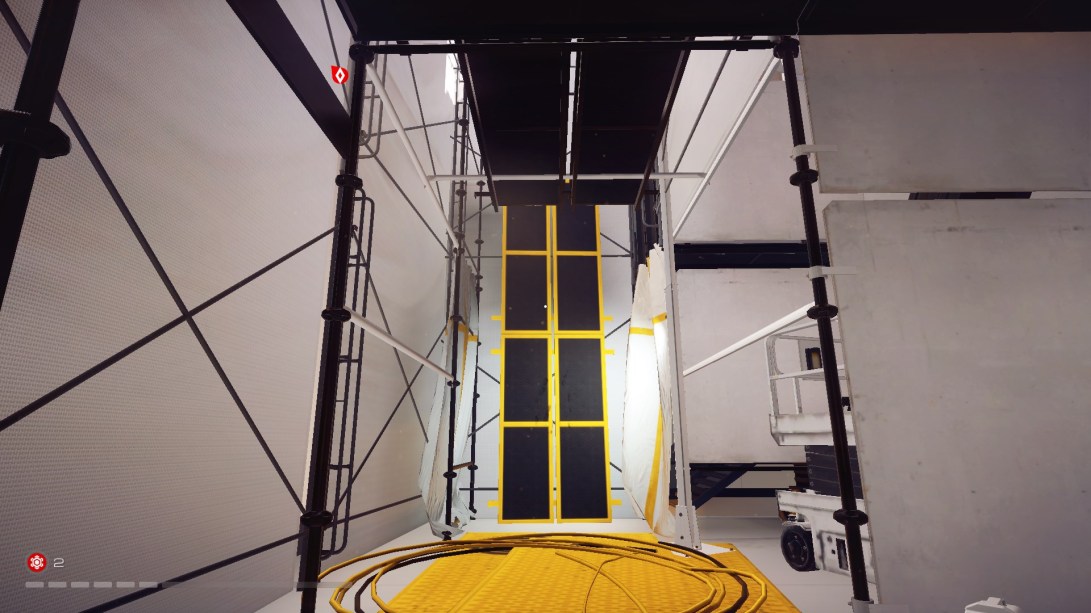
Lighting
Another one that I’m used to from Team Fortress 2 and Left 4 Dead: players naturally gravitate towards areas of brighter light, so it can be used to draw the eye and lead them on without conscious thought. Look at the bright spots in both images below, and how much they stand out, even in the second image where everything else is relatively light too.

I’ve been making use of this as well in the Neon Arena alpha level, since it’s one of the tools available without any art assets.
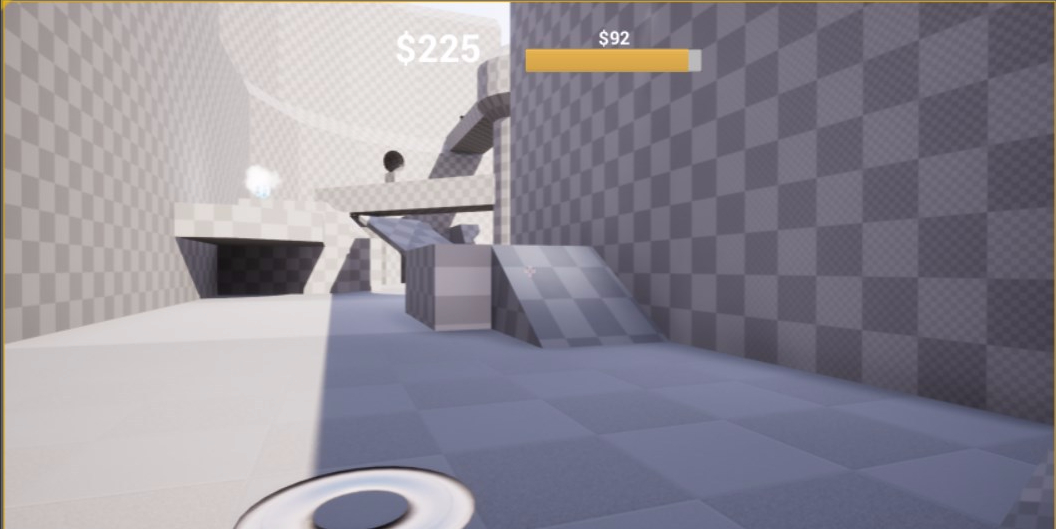

Non-Oblique Angles
No examples from Mirror’s Edge here, but below are a few pictures from Neon Arena – these are taken from the natural angle the player moves to.
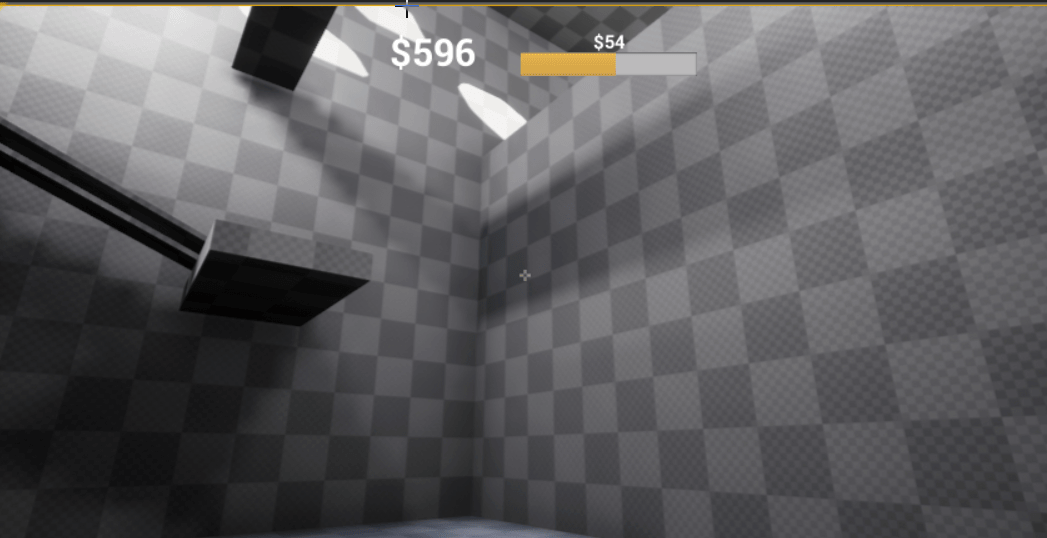
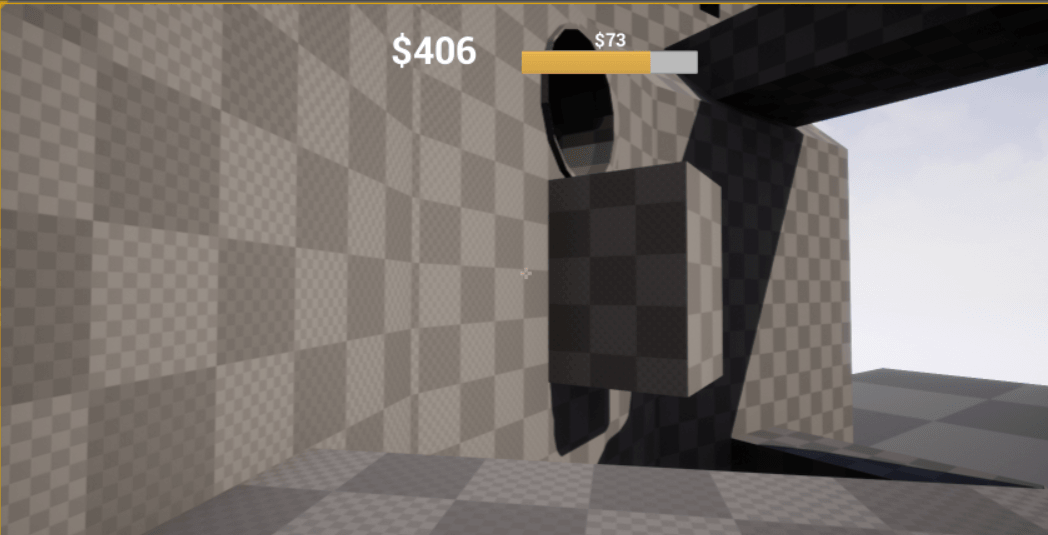 In both of these situations, what could have been a right angle is instead 22.5 or 45degrees, allowing the player to feel as if they’re moving “directly forwards” towards the target while still making the turn that’s needed. The player’s flow is maintained.
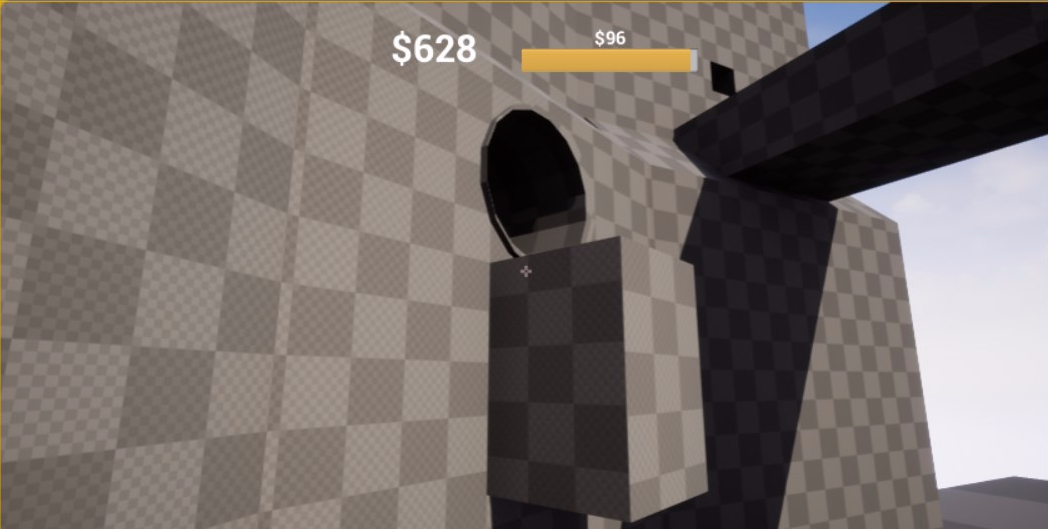
In the second image, to go from the wallclimb on the dark wall into the tunnel is a 90degree turn, but after the player momentum has already been spent on the climb. ME1 did this badly, often forcing the player to make 180 degree turns and end up going practically the opposite direction to before. The only 180deg turns necessary so far are those done as part of a walljump.
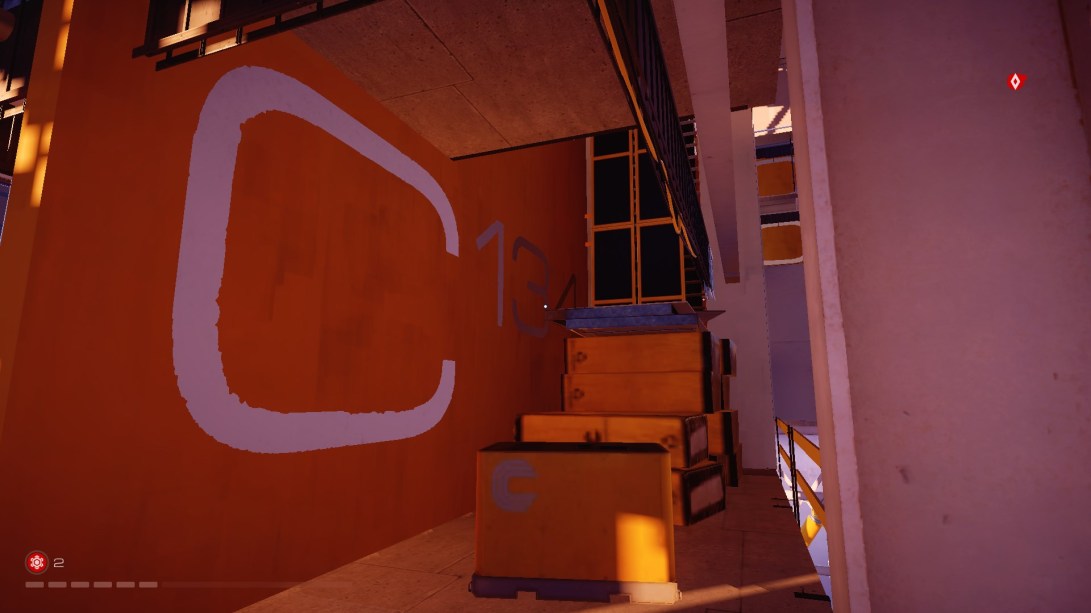
Composition
I knew when I opened the game to get screenshots the basic ideas of what I wanted, but the two images below shocked me – I simply wasn’t expecting this kind of composition.
Look at how everything in this image draws your eyes to the scaffold and the corner. The wires on the floor guide you round the corner, and the orange splash of the wood plank on the white tarpaulin is as clear as a path. The lights on the ceiling lead you around the corner too, and all the lines of the level – the floor and ceiling, the wall paint – point you at that corner, where the scaffold protrudes halfway to make it clear that the level extends there. It’s brilliantly lit, especially compared to the darker route on the left, and some boxes have been stacked to ramp up the density of detail there and nowhere else.

Similarly, look at the next image, and how the ceiling pipes and horizontal lines draw you down to the busier end, completely bypassing the (dead end) turning to the left.
It’s so well done. Smart and beautiful.
